
Your first 2D platformer
START WITH THE BIG PICTURE
What does this part of Epok do?
A guided first 2D game: create the Platformer 2D template, play it, paint new level from tiles and turn a picture into a crate that falls, bounces and gets pushed.
- 01Create and play the Platformer 2D template
- 02Paint level with tiles and terrains
- 03Add a rigid body and fix its warning
What is happening under the hood?
- 2D units are pixels with Y pointing down, like the screen.
- Tile collision comes with the tiles you paint.
- Warnings in the Hierarchy and Inspector name what a node needs, often with a one-click fix.
Field note: Delete the template groups you do not need early: it frees RAM and makes the Hierarchy yours.
Side-scrollers are the comfort food of game development: a character, some platforms, a jump that feels good, and suddenly it is 2 a.m. This tutorial starts from Epok's Platformer 2D template, plays it, paints a new piece of level, and adds a crate that falls, bounces and gets pushed around, all running natively on the PlayStation.
It takes about fifteen minutes. You need Epok installed and running; see Getting started if not.
1. Create the project
In the Hub choose New project, pick Platformer 2D, choose how its gameplay is written (C++, Blueprint or Lua; they behave the same) and press Create project.
The map opens in the Scene window's 2D mode, framed on what the game camera will show. Sprites draw with their real textures and animations, colliders are drawn the way the console resolves them, and the units are honest-to-goodness pixels with Y pointing down, like the screen itself.
2. Play first, ask questions later
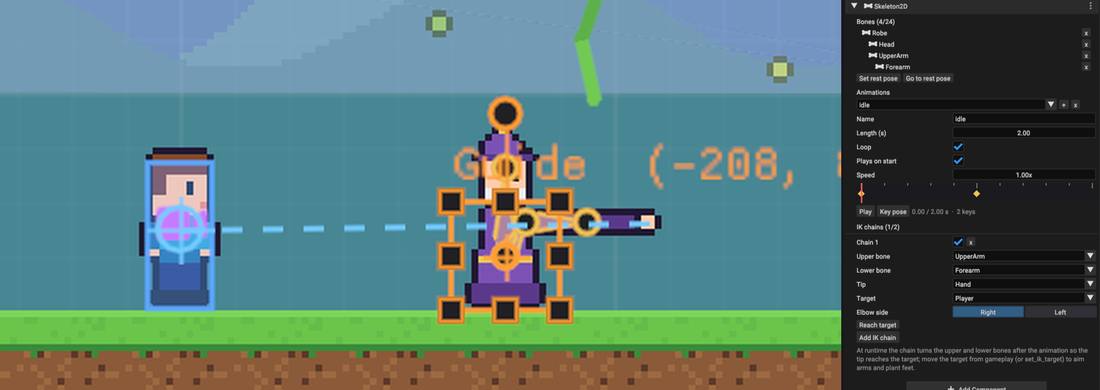
Press Play. Run left and right, jump onto the one-way platforms, ride the lift, push the crate, collect the coins. Notice the guide character pointing at you with its arm: that is a cut-out skeleton with IK, and it is judging your jumps.
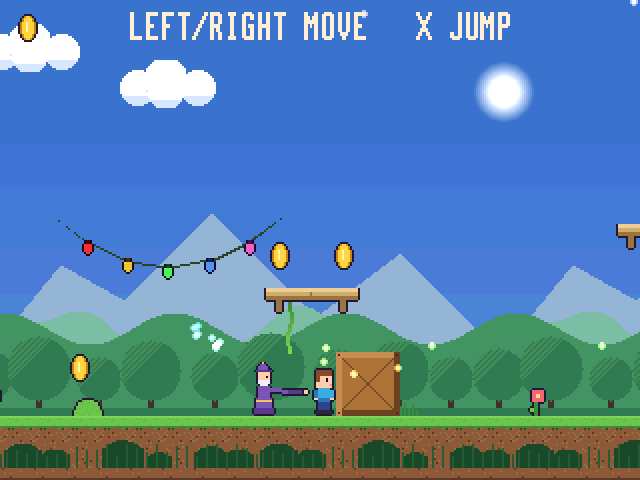
Everything you see is an ordinary node, grouped in the Hierarchy by purpose: Scenery, Level, Characters, Props, Coins, Effects and HUD. A real game usually starts by deleting the groups it does not need, which is the most satisfying button press in game development.
3. Paint some level
Stop Play and select Ground in the Hierarchy. The tile tools appear under the 2D toolbar and the palette opens under the view.
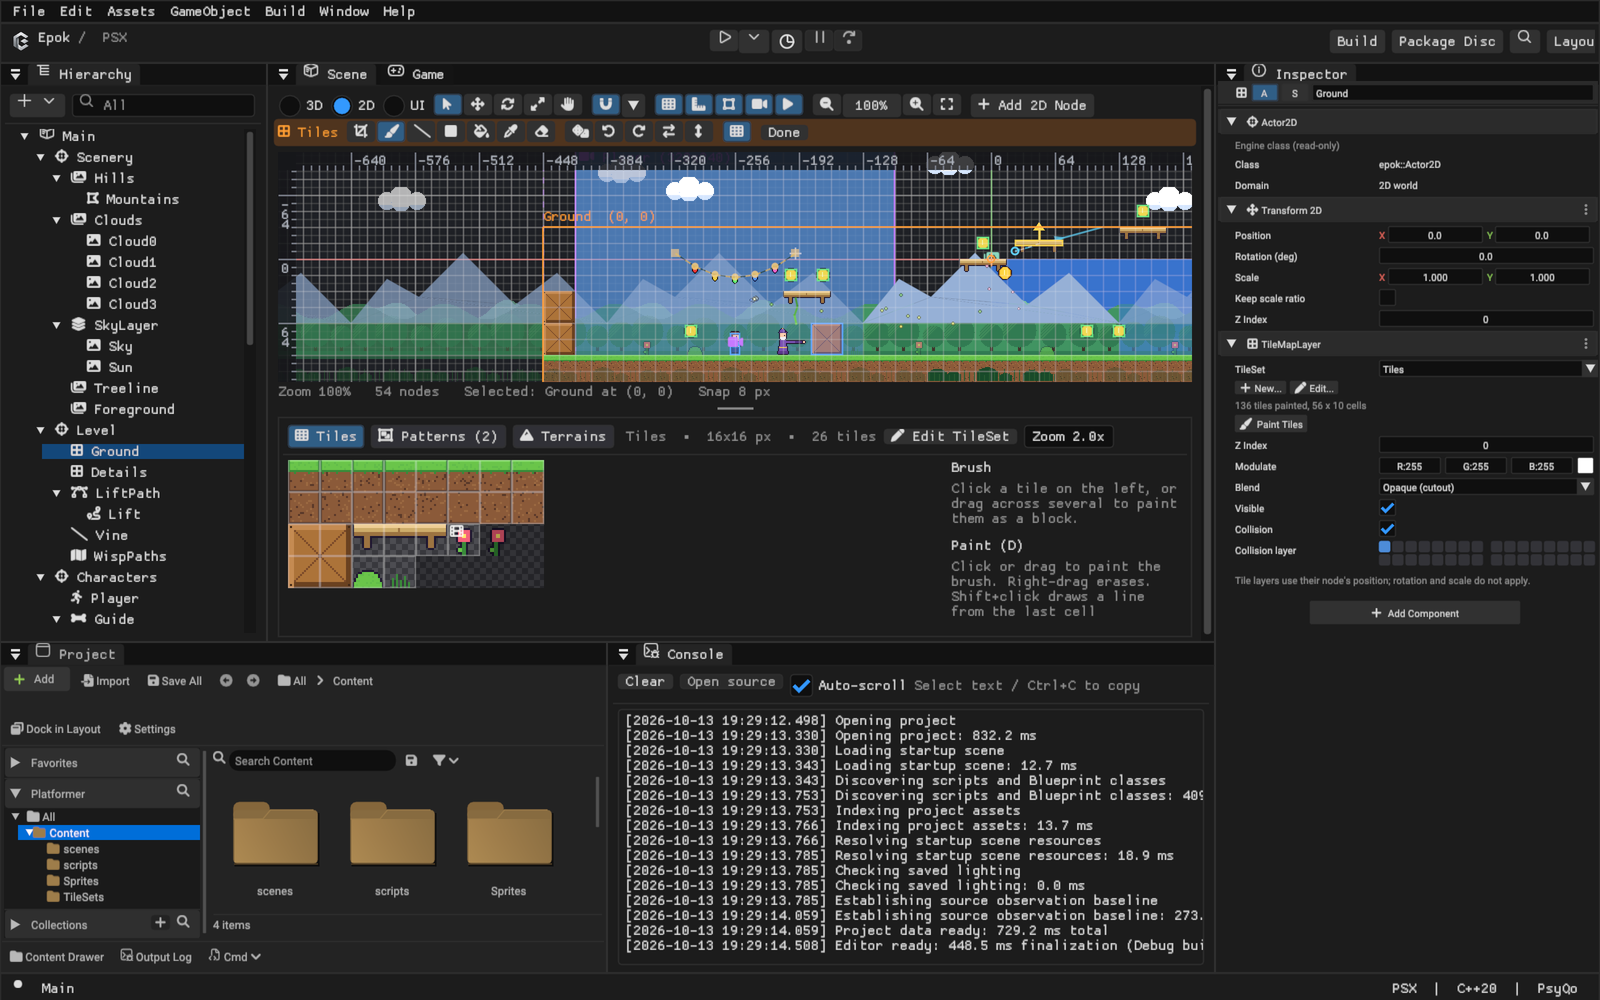
- Paint (D): click or drag to paint the brush. Shift+click draws a line.
- Rectangle (R): drag a filled block; a multi-tile brush repeats across it.
- Bucket fill (B): fill a connected area.
- Eraser (E), or right-drag with any tool to erase in its shape.
- In the palette, the Terrains tab paints ground whose edges and corners connect to their neighbours on their own. It is the closest thing to magic this page offers.
Every stroke is one undo step. Press Q or Done to go back to moving nodes, then Play and jump on your new platform. Tile collision comes with the tiles, so it is already solid.
4. Turn a picture into a crate with opinions
Open assets/Sprites in the Project panel and drag a texture into the 2D view. A
Sprite2D appears where you drop it; in its Inspector, pick the region or sheet cell
you want it to show. Right now it is just a picture. Pictures do not fall.
At the bottom of its Inspector press Add Component, type rigid and press Enter.
The sprite is now a RigidBody2D, and its Hierarchy row grows an amber warning sign.
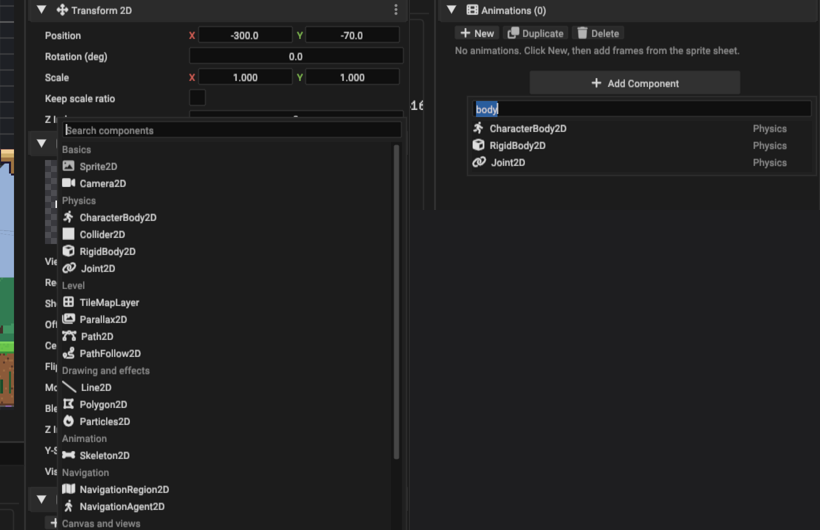
Select it and the Inspector says why at the top: a rigid body with no solid collider cannot hit anything. Press Add a Collider2D: a collider fitted to the sprite appears, in one undo step. Epok warns you before your crate falls through the floor, not after.
Now tune it in the Inspector:
- Mass: heavier crates move slower when the player pushes them.
- Bounce: 0 lands with a thud, 1 bounces back at full speed like it owes you money.
- Pushable: tick it so the player can shove it around.
- Frozen: tick it to keep the crate in the air until gameplay unfreezes it, for a trap that drops when a switch is hit.
Move the crate above a platform and press Play. It falls, lands and gets pushed. Physics, on a console with no floating-point unit. Take a moment.
5. Go further
The template already contains a tour of what the 2D world can do. Select these and look at their Inspectors:
- Garland: light bulbs on Joint2D ropes, with a Line2D drawing the cord.
- Wisp: a NavigationAgent2D that finds its way to the player around the tiles.
- Guide: a Skeleton2D cut-out whose arm aims with two-bone IK.
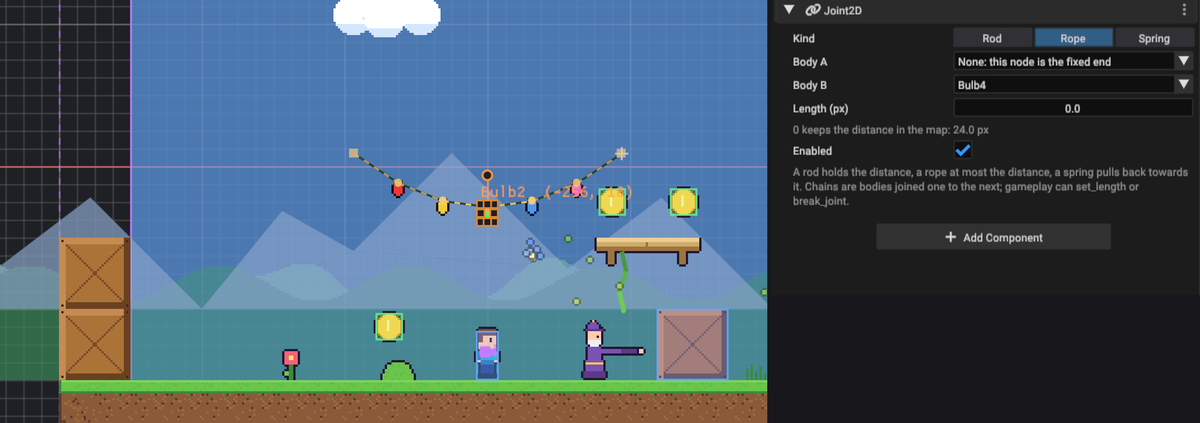
New nodes come from Add 2D Node in the toolbar: it opens with the cursor in a search field and your recent nodes on top. Type part of a name or a purpose ("rope", "enemy", "minimap") and press Enter.
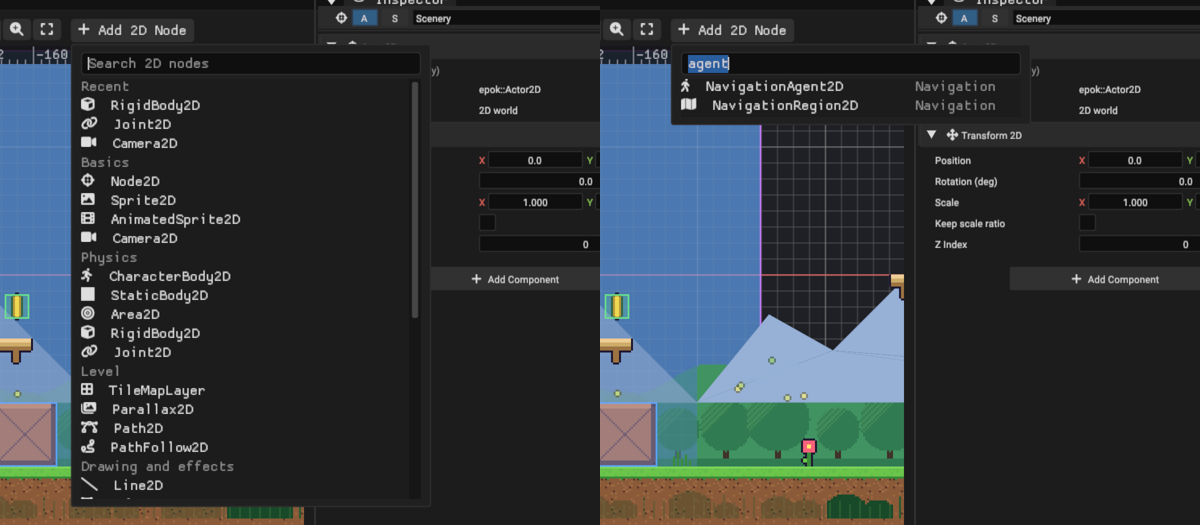
When you want a minimap or two players on one screen, SubViewport2D and SplitScreen2D are waiting in that same menu.
Where next
- 2D worlds: every node, tool, tile rule and limit.
- HUD and UI: health bars, menus, sliders and string tables.
- Your first Lua class or Your first Blueprint: write the behaviour that turns this level into your game.
You made a platformer that runs on a 33 MHz console. Your past self would be very confused, and very proud.